
AI manhua character consistency starts with an agreed visual identity, a reliable reference set, and a review process for every panel. Adding “keep the same character” to a prompt does not resolve conflicting references or an outfit that changes between requests. Define what must stay fixed before asking a model to preserve it.
This guide uses Lin Lan, an original adult investigator with a dark brown bob, teal cropped jacket, ivory shirt, and brown crossbody bag. The examples illustrate a production method, not a measured guarantee about ArtImgAI or any particular model. They concern still images and panel preparation, rather than video generation.
Five checks for AI manhua character consistency
Judge identity through a set of features: face structure, hair silhouette, clothing construction, signature props, and body proportions. Matching eye color alone is weak evidence. A character can have similar eyes but look unfamiliar because the jaw, haircut, and jacket have all changed.
Separate identity drift from legitimate perspective and lighting. A profile exposes less face width than a front view. A blue-lit night scene can shift the apparent jacket color. Those changes require interpretation, not an automatic rejection whenever two images contain different pixels.
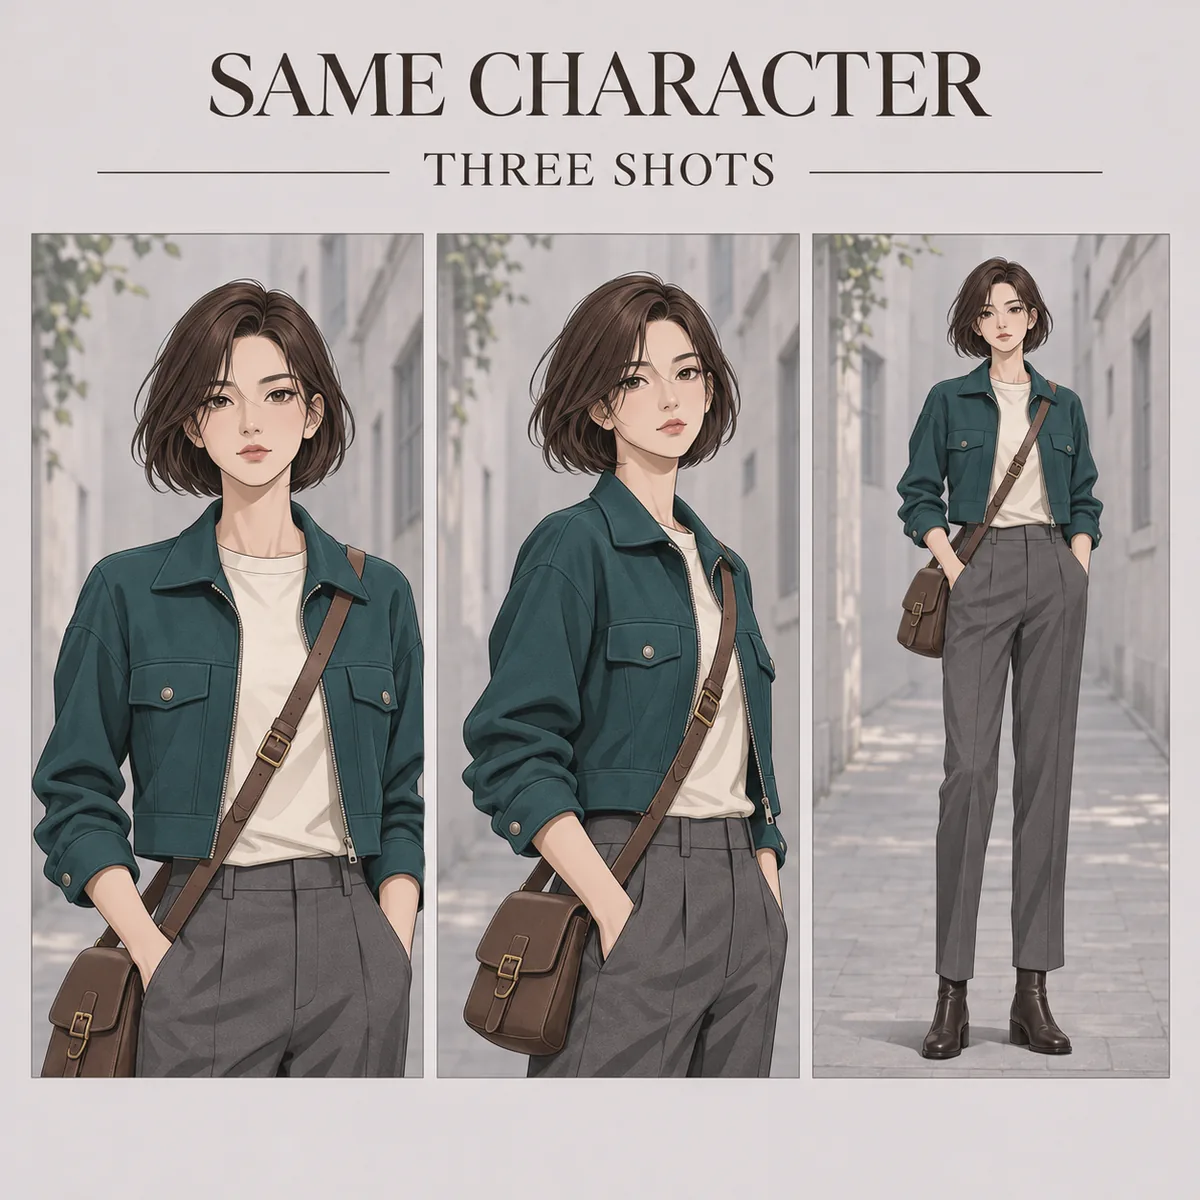
AI-generated teaching illustration: framing and direction may change while agreed identity anchors remain recognizable.
| Check | Inspect | Allow for |
|---|---|---|
| Face | Jaw shape, eye spacing, brow design | Perspective and expression |
| Hair | Length, part, fringe, back silhouette | Wind and motion |
| Clothing | Neckline, sleeve length, jacket hem | Folds and colored light |
| Props | Strap direction and attachment points | Occlusion and camera position |
| Proportions | Head-to-body relationship and shoulder width | High and low camera angles |
1. Resolve reference conflicts before generating panels
Choose one master reference as the authority for appearance. Supporting images should explain missing views, not quietly redefine the character. If the front image has a crew neck and the profile has a collar, resolve that disagreement before supplying both as if they describe the same approved outfit.
Keep style experiments, alternative haircuts, and seasonal outfits in separate folders. Several attractive pictures do not necessarily form a coherent reference set. A collaborator needs to know which version is current and which details a supporting image is allowed to clarify.
Use the turnaround guide when the side or back remains ambiguous. Add a reference because a particular shot needs information, rather than assuming that more images always improve the result. A small, consistent set is easier to inspect and explain.
2. Keep an identity block and replace the shot block
Split the prompt into persistent appearance and temporary direction. Copy the persistent block without changing its vocabulary. Put expression, framing, and location into a separate block that can be replaced for each panel. Include an approved reference only where the selected workflow actually accepts image inputs.
Identity: Lin Lan, adult woman, narrow face, chin-length dark brown bob.
Teal cropped jacket, ivory crew-neck shirt, charcoal trousers.
Brown bag strap over her left shoulder; bag at her right hip.
Use the supplied master reference as the appearance target.

Shot: Medium framing, three-quarter view, standing at an old-city alley.
Slightly furrowed brows, looking toward screen right. Balanced light
keeps the face and neckline readable.

Change in this revision: Direction and expression only.
Preserve: Hair silhouette, clothing construction, and prop placement.
Distinguish screen directions from anatomical directions. “Screen right” describes the image; “her left shoulder” describes the character. Mirroring an image may improve composition while flipping a bag, scar, badge, or dominant hand. Check asymmetrical features after any flip instead of treating it as a harmless layout operation.
Do not claim a dedicated reference-control feature exists simply because a text prompt mentions a reference. The input route and chosen model matter. When a control is absent, describe the limitation and use a workflow that genuinely supports the input you need.
3. Build a controlled test sequence
Start with a front medium shot in even light. Then test a three-quarter angle, followed by the more difficult camera angles, movement, and night lighting needed by the story. This is a suggested diagnostic order, not a claim that every model performs best in the same sequence.
Change one major variable at a time while investigating a failure. If you replace the outfit, camera angle, style, and lighting together, the result may improve or worsen without explaining why. Keep the input and the reason for accepting or rejecting each attempt so a useful discovery can be repeated.
Include at least one wide shot in the test. A character who looks convincing only in portraits may become hard to recognize when the face is small. A strong silhouette or color block can carry identity at a distance, while a tiny facial detail cannot do that job alone.
4. Match the repair to the failure
If the face changes, inspect reference clarity, occlusion, and angle coverage first. If clothing changes, remove inconsistent synonyms and check the neckline or seam specification. If a strap seems missing, decide whether it has actually disappeared or is simply hidden by an arm and jacket fold.
When most of a panel already works, inspect the editing options available in the image editor rather than automatically regenerating everything. A targeted edit may help preserve useful composition, but it still needs review. Fixing a strap can alter a shoulder or nearby clothing, so inspect the boundary around the edited area.
Treat a style change as a new validation round. Thicker outlines, simplified eyes, and different shading can affect perceived identity even when colors match. Preserve the original approved version, label the new style, and repeat the important angles before mixing it into an existing episode.
5. Review in sequence with a lightweight log
Record the panel number, character version, reference filename, accepted features, and required corrections. For example: “Panel 03, Lin Lan v01: face and hair accepted; strap reversed; repair required.” The goal is a shared decision standard, not an elaborate scoring system.
Separate identity failures from acceptable variation. A wrong haircut may require correction; a minor fold that does not change the outfit or story may be acceptable. Agree on that boundary before multiple people begin approving panels independently.
Finally, view panels in story order. Individual images can look convincing in a folder while producing an obvious jump when a close-up follows a wide shot. Check entrances, exits, costume transitions, and left-right relationships. Continuity is partly a property of the sequence, not just of each standalone image.
Frequently asked questions
Why does the same character prompt produce different faces?
The words may permit several visual interpretations, and generation can vary between requests. First verify that the reference and available settings actually match. Then isolate the problematic angle or feature. One successful output does not establish that every later request will preserve the same identity.
Does a fixed seed guarantee consistent AI characters?
No. Where a workflow exposes seeds, they help document experiment conditions. Changes to the model, framing, size, and other inputs can still affect the result. Identity needs visual review. Do not imply that ArtImgAI exposes a particular parameter unless it is present in the current interface.
How many character reference images should I use?
Start with one clear master, then add views that resolve a specific gap. Contradictory references can make the target less clear. The character design workflow explains how to approve the base image before expanding the set.
What if two characters exchange features in a shared panel?
Describe each person with an explicit position, outfit, and prop rather than ambiguous pronouns. Validate the individual designs first, then test the shared shot. If the workflow still mixes features, consider preparing separate character assets and combining them in an appropriate editing workflow, with a final continuity check.
Put the identity block and review log into the character template. Establish three dependable panels before scaling up: a modest test with clear acceptance criteria is easier to manage than many untracked retries.